How To Make Baby Salve

Ever the game players, my daughter and son-in-law asked us to play a word game just shortly after arriving to our house for Thanksgiving. “Hmm. They’re getting a little overanxious with this game thing,” I remember thinking.

Five minutes later we were trying to puzzle out a maze of words when my husband started yelling, “Is it true? Is it true?”

With my mind on Thanksgiving details, I was only half with it. I looked closer at the words. “Andrew. August. Amber. Baby. Expecting.

I jumped up and down for the next five minutes as it sank in that we were going to be grandparents!

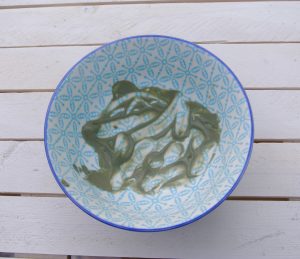
Best Diaper Cream for Babies

With that joyful news, I started pondering what botanical product I wanted to make for the baby shower. I’m all about chemical-free and natural, so I thought a salve that could double as a diaper rash cream would be perfect.

As I worked on the formulation, I realized that for a newborn, simple is best. Over the last few years, information has changed a bit regarding essential oil usage on newborns. The current information that I learned in my certification studies is that it’s best to wait until a baby is about six months of age before starting to use highly diluted essential oils topically. Please keep in mind that this applies even more so for premature babies because they have high skin permeability. (And please remember, it’s never a good idea to have a baby ingest essential oils, either.)

Now the caveat to my previously mentioned “nevers” is if your child is under the care of a doctor, naturopath, or clinical aromatherapist, and they advise otherwise.

However, in this case, I left out all essential oils from the recipe so that I—or you—wouldn’t be worried about using the baby salve on any age baby.

With that in mind, let’s look at the recipe. It’s really pretty simple.
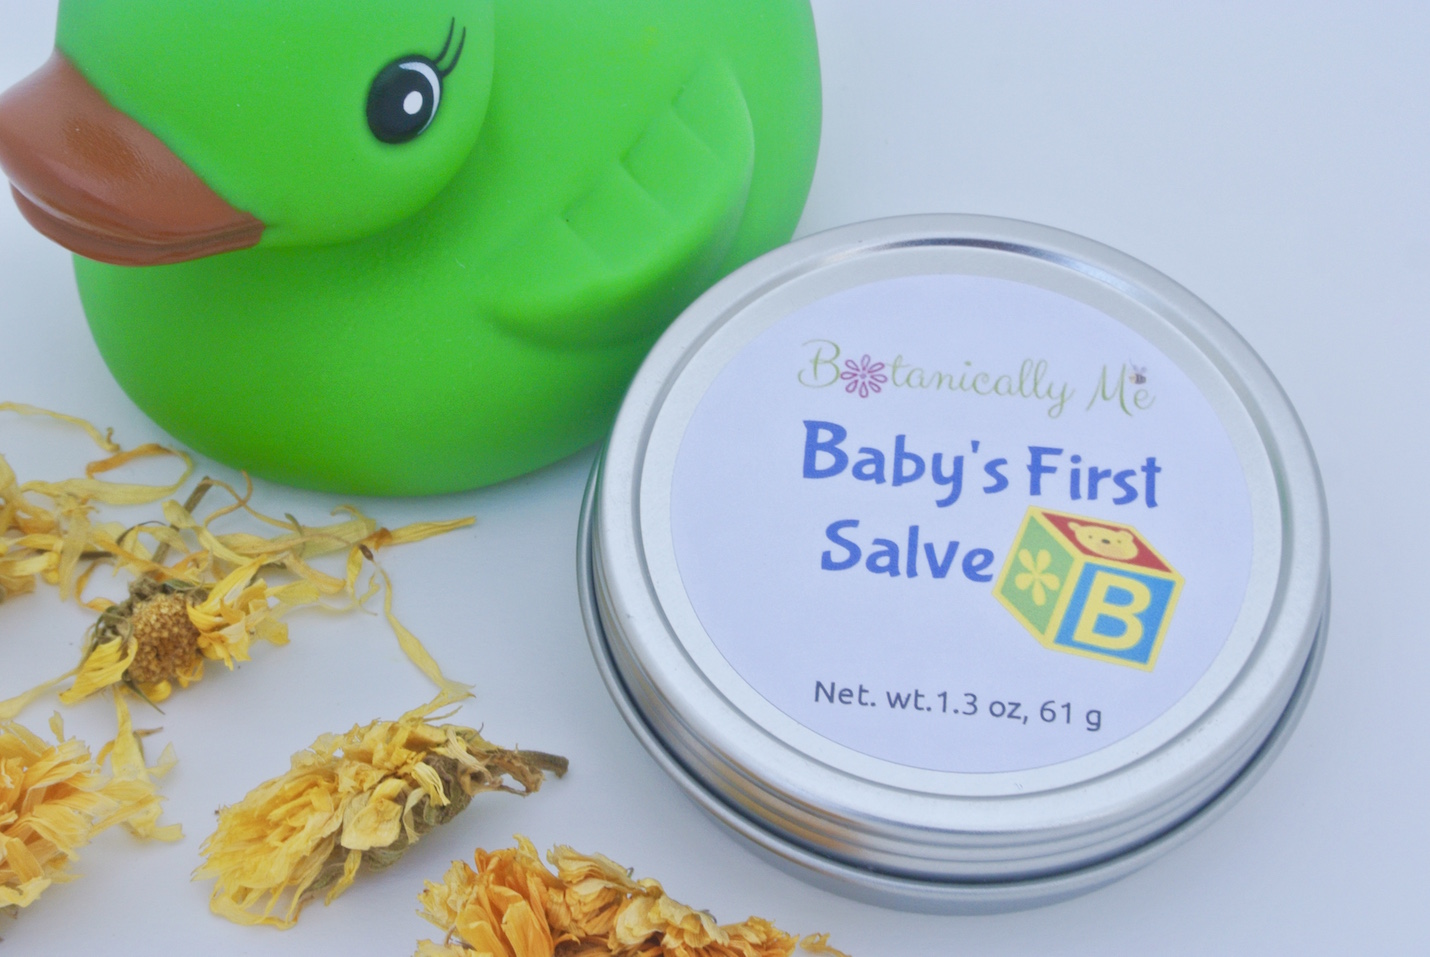
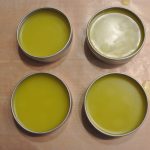
Baby's First Salve

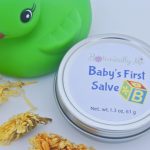
A natural, chemical-free salve recipe that doubles as a diaper cream.

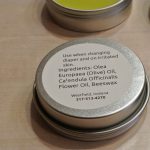
  • 70 grams extra virgin olive oil (58%) ((EVOO is perfect for medicinal products))
  • 36 grams calendula oil (30%)
  • 14 grams beeswax (12%)
  • steel tin or glass container

Makes aout 4 ounces of salve.

    Beeswax

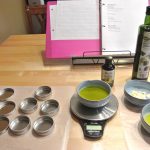
      1. Weigh and measure out all your ingredients. 

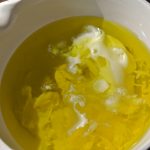
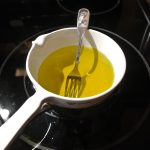
      2. Begin melting the beeswax in a double boiler.

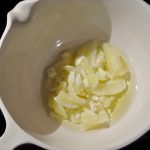
      3. When partially melted, add the calendula oil and olive oil.

      4. As you add the oils, the beeswax may harden again a bit, so continue to stir until everything has liquefied. I find that using a baby fork to stir works very well and it’s easy to clean.

      5. Remove from heat, carefully wipe down the pot you are pouring from so that no moisture drips into your containers and pour immediately into sterilized containers.

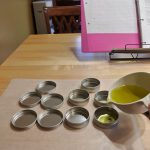
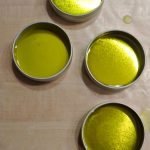
      6. Let set until it has hardened, about an hour or two depending upon the size of containers you are using.

      7. As it hardens the salve will change from clear to opaque.

      8. Be sure to label your product, including the ingredients.

      About the Ingredients

      Olive oil is a wonderful oil to use when making medicinal type products. It has a low risk of oxidative degradation. It contains vitamins E, K, squalene, and carotenoids. It’s an antioxidant that is helpful wound healing, dry skin, and for eczema,  just to name a few things.

      Calendula oil is an herbal oil you make through infusion, and it’s a powerhouse oil for the skin. I love growing my own calendula, drying it, and using it to infuse olive oil. It’s wonderful for wound healing and tissue repair, inflamed skin conditions, cracked skin, cracked nipples due to breast feeding (nontoxic to baby), burns, insect bites, and damaged tissues and ulcers.

      Beeswax is an emulsifier and a thickener, which makes it so beneficial in natural cosmetics. It helps seal in moisture to your skin. It is also healing for your skin. A powerful trio of ingredients used together in many recipes are beeswax, honey, and olive oil. It’s interesting to note that beeswax is being studied for its antimicrobial properties.

       How To Use Baby’s First Salve

      There are several ways to use this salve.

      •  Apply it when changing baby’s diaper to protect the skin and help heal it.
      •  Nursing mothers can use this salve on sore/cracked nipples. It is not harmful to babies.
      • Irritated patches of skin. My grandson has been teething and was constantly drooling, which caused a rash on his chin. My daughter applied some of the salve to this area.

      For sanitary purposes, I would recommend reserving a separate container of the salve for using with diaper changes and a separate container for other uses.

      Baby’s First Salve is a simple, easy way to safely care for and nurture your little blessing. And best of all, since you made it, you have complete control over every ingredient. If you decide you don’t want to make your own, you can purchase Baby’s First Salve from my line of botanical products.

      Use in good health!

      Botanically me,


      From Garden to Table: 4 Ways to Use Nasturtium

      Have you looked out the window at your garden lately? The beginning of August is prime garden season in Indiana where I am. Most of the plants that l planted back in April and May are growing like mad. It’s time to start reaping the benefits of these beautiful blooms. Where to start?

      Nasturtiums spreading joyfully through the garden

      For me, I’m starting with my nasturtiums.

      From just three or four plants I planted this spring, I’ve got a bumper crop of nasturtiums. If you’ve not planted them before, they spread like crazy and happily fill in the blank places in your garden. They’re a low-maintenance, high-enjoyment type of plant. Let’s look at some ways I like to use them at my house.

      Arrange them in a Vase

      I love to snip several stems of nasturtiums, tie them together, add water, and put them in a pretty little vase. It doesn’t get much simpler than that. But simple doesn’t mean boring. They certainly pack a punch of color and scent. I adore the smell of nasturtiums. They’re a close second to the scent of roses. When you walk by a patch basking in the summer sun, you can’t help but be enveloped in their warm, sweet aroma. And even a small display in your home will infuse your room with their lovely scent for a few days.


      Add them to your Salad

      Both the flowers and the leaves of nasturtiums are edible and high in Vitamin C. Snip the mild-peppery flavored leaves into smaller pieces and toss them in with other salad greens. The flowers are tasty too and make a beautiful display in your salad. I purchased a bottle of violet balsamic vinegar from a specialty shop, and I splash that over the top of the salad along with EVOO (extra virgin olive oil). Use about twice as much EVOO as vinegar. It tastes divine!


      Make a Roll-up with the Leaves

      Nasturtium leaves can grow as large as the palm of your hand, so they make an excellent roll-up for cheese spreads, tuna, egg, or chicken salad, and the like. Simply spread the leaf with the

      filling of your choice (I love dill-flavored cream cheese), add any other filling you desire such as shaved turkey or ham, roll up, and secure with a toothpick. Arrange on a plate and drizzle your favorite type of dressing over the top. To really make it shine, add a few nasturtium flowers to the plate.


      Recipe from Phyllis Shaudys The Pleasure of Herbs

      My very first herb book that I ever purchased was The Pleasure of Herbs by Phyllis Shaudys, and it is still my favorite. I bought my copy in the 1980s and it is packed with recipes and projects. I found this recipe for Nasturtium Salad, which she adapted from the Herb Society of Greater Cincinnati in the August chapter, and I’ve adapted by adding lettuce and other vegetables.

      Nasturtium Salad
      Author: Phyllis Shaudys
      Cuisine: salad
      Serves: 4 servings
       

      Ingredients
      • 1 cucumber
      • 1 cucumber
      • 12 small nasturtium leaves
      • 12 small nasturtium leaves
      • ½ tsp. Dry mustard
      • ½ tsp. Dry mustard
      • 2 Tbsp. Wine vinegar
      • 2 Tbsp. Wine vinegar
      • 6 Tbsp. Salad oil
      • 6 Tbsp. Salad oil
      • Salt, freshly ground pepper to taste
      • Salt, freshly ground pepper to taste
      • 2 Tbsp. Chopped fresh tarragon
      • 2 Tbsp. Chopped fresh tarragon
      • 6 Nasturtium flowers with leaves

      Instructions
      1. Peel and slice cucumbers thinly. Wash cherry tomatoes, red pepper, mesclun leaves. Wash nasturtium leaves; remove stems and drain. Mix well in blender the remaining ingredients except for the flowers with leaves. When ready to serve, combine the cucumbers, small nasturtium leaves, mesclun, tomatoes, pepper strips and the dressing and toss gently. Garnish with the flowers with leaves.

      #version#

      Now it’s your turn. If you don’t have nasturtiums in your garden, choose something else and delight yourself in the botanical goodness that’s right our your back door. Leave a comment as to what you’re harvesting today!

      Botanically me,

      SaveSave

      SaveSave

      SaveSave

      SaveSave


      French Green Clay for All Skin Types

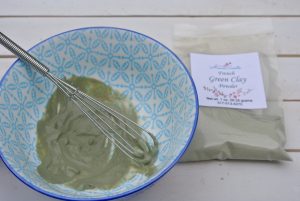
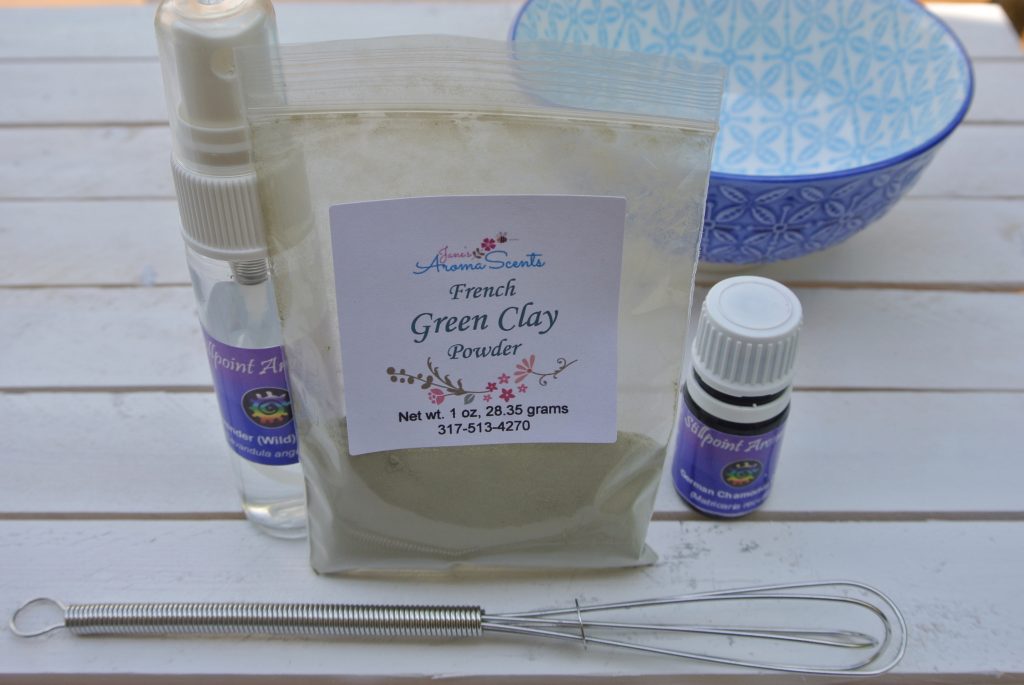
      I love going to get a facial, but it’s usually a rare treat for me. For about three days after, my skin glows and fine lines and wrinkles are diminished. Wouldn’t it be nice to get similar results more often?

      Well, my daughter Amber and I recently discovered we can when we use a French green clay mask. I’ve used bentonite clay powder before, mixing up a wonderfully effective bee-sting remedy for the occasional stings my husband and I get as beekeepers. But I hadn’t tried any other type of clay until last week.

      After reading about the benefits of green clay, I picked some up at my favorite place for such sundries, at the herb room at Good Earth health food store in Indianapolis. Amber and I happened to be together

      Amber and I loved our French green clay masks!

      during a vacation, and we were both excited to try it. Even though we have different skin types, this green clay powder worked for us both.

      Why are Clays Good for Your Skin?

      First of all, all clays have absorbed goodness from the earth and help to rejuvenate the skin and protect it from aging. According to Valerie Worwood in The Complete Book of Essential Oils & Aromatherapy, green clay is the finest of clays and can be used for all types of skin including acne, oily, dry, and aging skin. I know it seems too good to be true, but it worked for my aging skin and Amber’s oily skin. French clay is rich in the following minerals: calcium, magnesium, potassium, and sodium, and it energizes the connective tissue. It is also antiseptic, healing, and emollient, with the result being silky skin. Besides those more obvious results, it performs the important task of increasing the lymph flow and circulation, which helps to eliminate waste products from your body.

      What Did I Notice After Using my Green Clay Mask?

      Here’s what I noticed after washing off my face mask:

      1. my skin felt silky
      2. fine lines were diminished
      3. my skin tone evened out

      As a nice side benefit, just the very act of giving myself a home facial was very relaxing and pampering. Amber and I had so much fun doing this together too.

      French Green Clay Recipe

      This clay is very versatile. To make one application for a facial, here’s a basic recipe:

      • 3/4 tsp French green clay
      • 1/2 -3/4 tsp liquid, depending on how thick you like the mask

      I know this sounds like a tiny amount of clay, but trust me, it’s enough for one application. Here’s a picture of how much it made in my bowl and how much was left after I applied it.

      Before applying (This is 3/4 tsp of clay and 3/4 tsp of liquid).

      As far as the liquid goes, you can use water, but my favorite ingredient to use is rose hydrosol or rose water or another type of hydrosol. Or you could brew a cup of chamomile tea and add that to the clay. I like to use a tiny whisk, stirring until the mixture is smooth.

      Once you have your liquid of choice mixed in, consider adding 1 drop of an essential oil. This ups the healing properties of the mask as it can be tailored to your skin type and makes it an aromatherapy experience as well.

      Here are a few suggestions of essential oils to add based on skin type to get you started:

      1. For acne, try adding 1 drop of tea tree or geranium essential oil.

        After applying the French green clay to my skin.

      2. For aging skin, add one drop of rose essential oil.
      3. For sensitive, inflamed skin, add 1 drop of German or Roman chamomile.
      4. To help you relax, try adding 1 drop of lavender.

      The recipe is very adaptable to experimentation. If you don’t have a local source for French green clay, you can purchase it from my Square Shop.

      Let me know if you have used a green clay face mask and what your favorite facial recipe is.

      eScentually yours,

      SaveSave


      Make Your Own Violet Tea

      Make a Violet Tisane
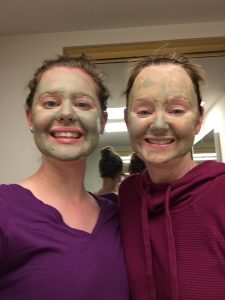
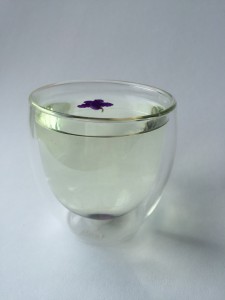
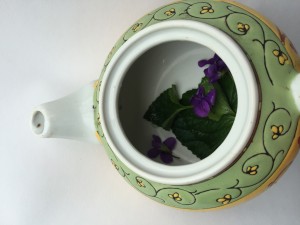
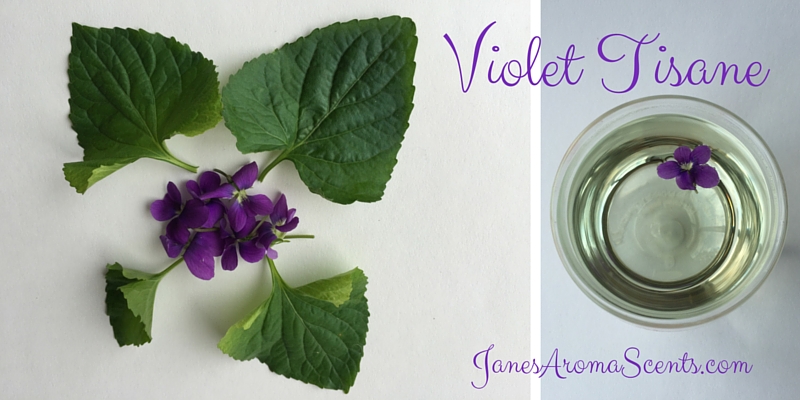
While you’re enjoying the beautiful violets gracing the front lawn, why not try making your own tisane to sip on a spring afternoon? Violet leaves contain Vitamin C and their mild, earthy taste is refreshing. Add a bit of honey to sweeten it up, and you’ll enjoy your pretty and tasty tisane.

      Before picking your violets, just a few things to keep in mind: be sure that they have not been treated with fertilizer or pesticides. Only use IMG_2576
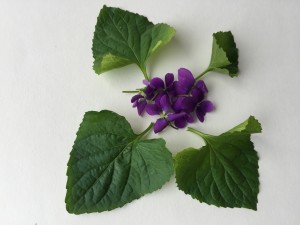
plants that are safe. And do not use African Violets. That is a different plant entirely.

      Ready to start? Here’s the recipe you can print off if you’d like. Let me know if you try the tisane and what you think. Happy spring!


      Violet Tisane
      Author: Jane VanOsdol
      Recipe type: Beverage
      Cuisine: Tea
       

      Drink this light, earthy tea for a spring treat.
      Ingredients
      • 6 violet blossoms
      • 4 violet leaves
      • Honey if desired
      • Boiled water

      Instructions
      1. Boil 8 oz of water.
      2. Add the blossoms and leaves to a tea bag or tea pot and pour the water over them.
      3. Steep for 3 minutes.
      4. Strain.
      5. Add honey and a fresh blossom to your cup if you’d like.
      6. Enjoy!

      3.4.3177


      IMG_2581
      IMG_2577


      Rosemary-Lemongrass Salt Glow

      salt scrub, salt glow, aromatherapy, aromatherapy gifts, essential oils,One of the joys of Christmas is giving gifts that you know people will enjoy. In my view, it’s even better if I’ve made the gift myself. Over the years I’ve sewed, knitted, and even tried my hand at making jewelry (soon discovered jewelry is best left to those with some experience!). Since I’ve become an aromatherapist, many of my gifts now revolve around aromatherapy oils and herbs. Last year I made gift bags for my family that contained lip balm, salve, and lotion bars.

      If you’re ready to share the gift of aromatherapy by making some products yourself, I can help. This post will show you how easy it is to make a salt scrub for gift giving.

      This makes a salt scrub a valuable gift for all of us, and even more so for someone who is not able to exercise due to poor mobility. Exercise is one of the main ways that lymph is stimulated in our bodies, but a salt scrub or skin brushing will also stimulate lymph. Besides the health benefits, salt scrubs smell wonderful and are a pampering experience for your skin.

      Enjoy the recipe below and feel free to try your own combinations of essential oils and vegetable oils. *A word of caution: People with seizure disorders should avoid the use of Rosemary. I would suggest lavender instead of the Rosemary, about 15 drops.

      Feel free to share a favorite salt scrub recipe you enjoy. Merry Christmas and happy gift giving!

      Interested in a hands-on class to learn more about essential oils and aromatherapy? Check out my workshops in the Indianapolis area.


      Rosemary-Lemongrass Salt Scrub
      Author: Jane VanOsdol
       

      Ingredients
      • 1 cup fine-grain sea salt
      • ¼ cup vegetable oil (for example: almond, apricot, or sunflower)
      • 9 drops Rosemary Essential Oil
      • 6 drops Lemongrass Essential Oil

      Instructions
      1. Pour salt into a bowl and add the vegetable oil. Stir well.
      2. Add the essential oils. Stir until evenly dispersed.
      3. Store in a glass or PET plastic container.
      4. To Use:
      5. Use 2-3 times per week. Wet skin. Apply salt mixture, rubbing in a continuous motion over body, avoiding cuts.
      6. Avoid the face as salt is too rough for this delicate skin.
      7. Rinse off. Follow with a body lotion, cream, or oil.

      3.4.3177


      Aromatherapy: Essential Oils Cleaning Spray

      Essential Oil Cleaning sprayBrilliant leaves, crisp apples, and chilly temperatures herald the coming of fall and winter. Unfortunately, red leavesalong with the changing of the season also comes exposure to colds and flu. Let’s be proactive and explore some ways we can stay as healthy as possible during the next few months. In my next few posts, I’ll explore how aromatherapy and herbs can support us through the fall and winter.

      One of the most basic things we can do to fight nasty bugs is to keep our homes clean. I know, it’s a battle, especially with children in and out of the house, but here’s an essential oil cleaning solution that will help you quickly mop up messes and leave a lovely aroma behind. No chemically smell here.

      Aromatherapy Spray Cleaning Solution

      Keeping your home clean can help prevent the spread of germs that make us sick. Perhaps you love using essential oils in creams and for inhalation, but haven’t considered using them while cleaning. Well, with the antimicrobial, antibacterial, antifungal, and antiviral properties of

      Here’s a quick rundown of some of the main therapeutic actions of each oil as it pertains to cleaning (I’m not covering all their properties, e.g. for healing or emotional issues, just cleaning). Historically, these oils have been known for the following properties:

      • Eucalyptus: antibacterial, antiviral
      • Lavender: antibiotic, antiseptic
      • Lemongrass: antibacterial, anti fungal, antimicrobial, antiseptic, antiviral
      • Rose geranium: antibacterial, antifungal
      • Tea tree : antibacterial, anti fungal, antimicrobial, antiviral

      By no means does this cover all of the EOs that would be useful in a cleaning solution. This one includes some of my favorites. How about you? Have you concocted a cleaning recipe that works wonders for you? Let us know about it in the comment section.

      Here’s to a healthy fall and winter!

      Aromatherapy for Cleaning: Spray Solution
      Author: Jane VanOsdol
      Recipe type: cleaning
      Serves: The synergy yields enough for 4 14-oz spray bottles.
       

      Use this lovely-scented spray for general cleaning in the kitchen and bathroom.
      Ingredients
      • Eucalyptus (radiate or globulus is fine) 5 drops
      • Geranium 6 drops
      • Lavender 9 drops
      • Lemongrass 7 drops
      • Tea Tree 6 drops
      • 14 oz of filtered water

      Instructions
      1. Mix this synergy of essential oils and store in a colored, glass bottle.
      2. Fill a spray bottle with 16 oz of water and add 8 drops of the synergy to the bottle.
      3. Shake well before spraying.
      4. Keep out of reach of children.

      3.4.3177