Starting Seeds Indoors with Rita Ward

starting seeds indoors

Recently, the Polar Vortex had most of the U.S. in its icy grip, including the Midwest where I live. This winter we’ve been socked in with cold temps and snowy days. So it’s with great joy that I can make this announcement: 

 It’s time to think about starting seeds indoors for your spring garden! 


A Quick Background

Rita Ward
Rita Ward

If it seems early to you, consider that lifelong gardener and seed starter extraordinaire Rita Ward has already been hard at work starting her seeds. Rita was my seatmate on a recent airplane trip, and as we talked and got acquainted, we discovered a mutual passion for gardening.“I’ve been gardening and going to farmers markets for 56 years,” she said. So I knew right away I could learn something from her. She was more than happy to give me some gardening tips to share, so let’s get started.

To give you a bit of perspective, Rita is retired and owns a small house located on her daughter’s 15-acre property in Cloverdale, Indiana. Each year she plants a full 1/2-acre plot and sells her produce all season long at the Greencastle farmers market and at a road stand in front of their property.

Rita’s Top 15 List

  • Tomatoes
  • Squash
  • Peppers
  • Melons
  • Corn
  • Green Beans
  • Sweet potatoes
  • Asparagus
  • Persimmons
  • Red raspberries
  • blackberries
  • strawberries
  • Apples
  • Peaches
  • Plums

Tomatoes Galore!

tomatoes

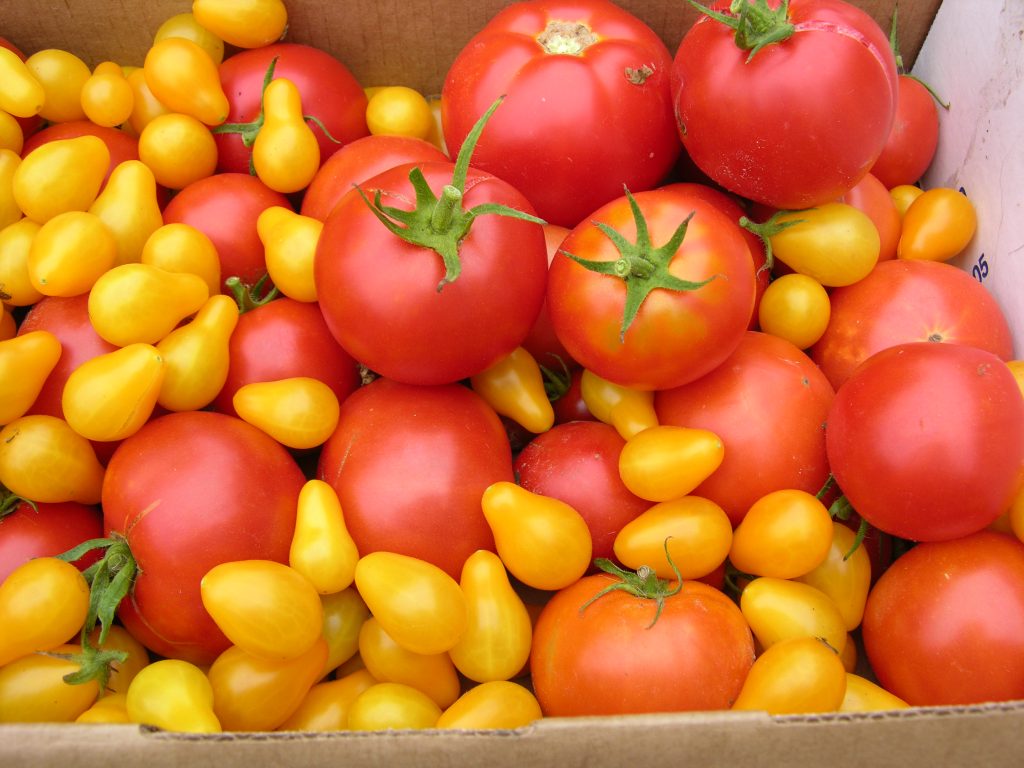
Every year Rita sets out an astonishing 300 tomato plants, all of which she propagates by starting seeds indoors. Now I’m sure that most of us will never need that many tomato plants, but however many you want to grow, it is much cheaper if you can grow the plants from seed yourself. Noting that “you can’t save seeds from hybrids,” Rita loves to grow all sorts of heirloom varieties.

Each year as she is harvesting her plants, she collects seed from her heirloom plants. She puts the seeds on paper towels to dry. Once they are dry, she puts the paper towel in a plastic bag, labels it, and stores it in the freezer until planting time rolls around the next year. 

Starting Seeds in a Greenhouse

Now, I’ve never been very successful at growing plants from seed, so I was interested to hear Rita’s method. Actually, way of life is the more accurate description. You see, Rita was born following the Depression.

“My generation and my family were taught not to waste and to take care of everything.”

Rita Ward

That truth is clearly evident in how she gardens.

Method 1

Being that her home is very small, Rita has to make use of outdoor space when starting seeds. Every year in late winter, she completely encloses her patio by wrapping sturdy plastic around the posts to make an outdoor room. Inside of the now enclosed patio she puts a small, inexpensive greenhouse (see a sample picture at the bottom of this post).

Since late February is still freezing in Indiana, she had to devise a way to heat her patio. Rita found an online tutorial that showed her how to make a mini fireplace using landscaping stones, a bread pan, candles, and an upside down flower pot.

Rita’s Flowerpot Fireplace

Rita’s Outdoor Flowerpot Fireplace DIY

Directions:

  1. Fill the large pot with a few inches of water and turn on the heat. Add one or two pillar candles to the pour pot and some paraffin wax and set in the double boiler. Melt. The wicks from the candles should sink to the bottom of the pour pot as they melt. Pour the melted wax into a bread pan and fill about 3/4 full of the wax. Discard any of the wicks from the melted candles. (NEVER set a pan with wax directly on a burner to melt. Wax is flammable. Always use a double boiler.)
  2. Take one emergency candle and cut it into 3 pieces, being sure each piece has about one-quarter inch of wick protruding from the top. As the wax in the bread pan is starting to set up, take two or three pieces of the cut emergency candles and set them in the wax with the wick sticking out. These will be the wicks that you will light for the bread pan candle.
  3. Let the pan cool.
  4. Place one landscaping stone flat on the floor inside the enclosed patio area (not inside the small greenhouse). Set the bread pan on top of the stone. Stand up two bricks on either side. Put the upside down flowerpot on top as shown in the picture.
  5. Light the wicks.
  6. Rita says one bread pan candle will burn all night.
  7. Of course, use extreme caution, especially around children. The flowerpot will get extremely hot.

I found a similar flowerpot fireplace online tutorial, which I am sharing here. The big difference here is that Rita’s candles burn for one full night, while these only burn for 3 hours at a time.

Method 2

Because this winter has been so cold, Rita has focused on starting seeds indoors in her small furnace room. She had just enough space for her greenhouse. The room is warm, so she doesn’t need to worry about any extra heat, so no fireplace needed! Keep reading for instructions on seed starting.

Rita’s Tips for Successful Seed Starting.

  • Try running a small fan to circulate air, helping to prevent fungus from forming on the plants.
  • If the greenhouse is indoors, leave the door of the greenhouse open. 
  • Be sure to keep the soil moist.
  • Use a mix of organic seed starter and organic potting soil. She thinks the seed starter is too light to use by itself.

Starting Seeds in a Paper Towel

Once her patio area/greenhouse is ready, Rita takes the seeds she has dried out of the freezer and works through the following steps:

  1. Purchase round plastic plant trays from the Dollar Store (the type you put under houseplants to catch water drainage).
  2. Line the bottom of the tray with a combination of organic seed starter mix and regular potting soil mixed together.
  3. Set the paper towel with the seeds that you dried directly on the soil and cover the paper towel and seeds with another layer of soil. Alternatively, purchase seeds and plant the seeds directly in the soil following the directions on the package. Carefully water. Cover the tray with a layer of plastic wrap. Make sure you keep the soil moist.
  4. While many sources advise to keep the seeds in the dark, Rita hangs LED electric candles (like the type you put in your window– see the picture) upside down on the rack so one candle is hanging above each shelf. She leaves them on around the clock. “The bulbs don’t get hot she says.”
  5. When you see sprouts, remove the plastic wrap or lid. Hang grow lights (pictured at the bottom of the post) and keep them 2 to 3 inches above the plants. Rita actually keeps her lights burning day and night. 
  6. Once the seedlings have two leaves, transplant them. Styrofoam cups with a hole work well or larger Jiffy pots (also pictured below). Continue to keep them under the grow lights until you move them outside.
  7. Rita deep waters the plants about once every 10 days. Between deep waterings, she mists them with a spray bottle when the soil starts looking dry.
Rita’s Greenhouse with Seedlings
seedlings
Growing Seedlings

Transplanting Outside

At the end of March, Rita moves the seedlings outdoors to their permanent location in the garden bed. Now this is about six weeks earlier than the last frost date, so she has to protect them. She covers about half of her half-acre plot with black plastic to cut down on the weeding and to help the soil warm up so that she can plant as early as possible. By this time she has over 500 seed tomato plants ready to be planted!

She then follows these steps for outdoor planting:

  • Cut a hole in the black plastic and insert the tomato plant in hole.
  • Take a sheet of newspaper, fold into a narrow strip and wrap around the base of the tomato plant. This helps to keep weeds at bay and helps keep the soil moist.
  • Cover the roots and up to the first leaves with  soil.
  • Stake and cage each plant.
  • Protect each plant  with a plastic milk jug in cold temperatures. Be sure to remove jug in warmer temperatures to prevent wilting.
  • She uses bamboo hoops and row cover fabric to further protect the plants in the evening and on any days that might be below freezing.

Since Rita gets such an early start with her plants, she is always one of the first ones at the farmers market to have tomatos to sell. In a good year, she’ll have tomatoes at the market by June 1.

Summer Harvest

Garden Harvest

With the amount of fruits and vegetables Rita plants, she has a bountiful harvest with plenty to sell and much to preserve. “Canning along with freezing, dehydrating, and wine-making keeps me from losing much from my gardening,” she said. 

Rita is thankful for the skills she has been given and wants to pass them on. “This is beginning to be a lost art, don’t you think?” she said. “I feel like the Lord gave me this, so I need to take care of it!”

Rita’s Tip for Greening Up Tomatoes, Peppers, and Roses

  • 1/2 cup Epsom Salt
  • 1 1/2 gallons water

Mix the salt in the water and use to water tomatoes, peppers, and roses once every two to three weeks. Often, she also adds fish emulsion to the mix.

Are You Ready to Try Starting Seeds Indoors?

Now maybe you don’t have a half-acre that you want to plant like Rita, but you’ve been inspired by her story to try starting seeds at home. Starting at least some of your crop from seed gives you a wider variety of plants to choose from, including more heirloom varieties. Here are a few suggestions:

  1. Start small if you’ve never done this before.
  2. Make your own seed starting kits by purchasing round plastic trays like Rita or try starting seeds in egg cartons.
  3. Or, if you want an easier option, buy a Jiffy seed starting kit (pictured below) that you can find in any garden center, big box store, or on Amazon.
  4. Purchase a set of grow lights at a big box store or online.
  5. Remember to water and follow directions carefully. 

Favorite Seed Companies

You can find seeds just about anywhere, but if you want to order online, here are some of my favorite companies.

  • Botanical Interests They have a great variety of seeds, and I love their option of purchasing large packets of seeds and seed collections. They also have the MOST beautiful seed package artwork.
  • Urban Farmer This store is just one mile from my house and they have a great selection of non-GMO seeds. They focus on heirloom varieties that don’t need to be cross-pollinated. They also sell garden supplies.
  •  Renee’s Garden.They also have a wonderful variety of seeds and beautiful artwork on the packaging as well.
  • Seed Libraries. The public library near me (Carmel Clay Public Library) actually has a seed file cabinet, where you can “check out” heirloom seeds to plant in your garden. Check and see if your community has something similar.

Are you ready for the 2019 gardening season? I know I am. What are you planting, and will you be starting seeds indoors? Leave me a comment. I’d love to hear your plans!

Botanically me,

email signature

Just to let you know, I am an affiliate for Amazon and Botanical Interests. If you happen to purchase anything from Amazon or Botanical Interests through my links, I will make a small profit from it, so thank you very much. It helps me to continue writing and working. I only recommend products I use/believe in.


Everything You Wanted to Know About Diffusing Antimicrobial Essential Oils for Kids

It’s that time of year when you hurry through the grocery store trying not to breath too deeply. All around you people are coughing and sneezing, spreading this year’s strain of the flu bug and who knows what else!

The last thing you want to do is get sick and spread it to your kids and husband. I can’t think of a better time than now to be proactive in diffusing antimicrobial essential oils at your house. 


Safety First

Before we consider which essential oils to use, we need to remember how to safely diffuse essential oils around babies and young children (see this post for more information on children and safety with essential oils in general) :

  • Don’t diffuse essential oils with children under the age of six months. 
  • Once children reach the age of six months, you can diffuse child-safe essential oils for short periods of time for acute conditions, such as a cold or flu.
  • Keep in mind that eucalyptus and certain chemotypes of Rosemary should be avoided on children under age 10. Don’t use peppermint with children under age 6. This is due to the possibility of slowed respiration caused by menthol and 1,8-cineole in the essential oils. (These guidelines apply to both topical use and inhalations.)
  • When diffusing essential oils, run the diffuser for about 30-45 minutes minutes. Then shut off for about  60 minutes. Do not run it continuously. 
  • Please check for interactions between any medications/herbs/supplements you may be taking and any oil you want to diffuse. Additionally, if you have a chronic illness, research any oils that may be contraindicated for your condition. Healthnotes is a site that may be helpful for this, as is ND HealthFacts.

Now that we know how to properly use essential oils, let’s look at the antimicrobial essential oils that are safe to diffuse with children over the age of six months. We’ll start with a quick definition of antimicrobial.

What Are Antimicrobial Essential Oils?

Antimicrobial essential oils are oils that have antiseptic (disinfectant) properties, meaning they reduce microbial growth. Using antimicrobial essential oils and a diffuser to help clean the air in your home is a potent weapon to have in your arsenal of natural health tools. 

But keep in mind that it doesn’t mean that each essential oil kills ALL the various bacteria, virus, and fungi out there; instead, each one is effective against certain ones.

Here is a study from PubMed for you to read to get familiar with some of the properties of a few oils: Antibacterial and antifungal activity of ten essential oils in vitro.

According to Kurt Schnaubelt, Ph.D., in The Healing Intelligence of Essential Oils p. 136,

“Diffusing them [essential oils] into rooms will lower the count of airborne microorganisms significantly, reducing the risk of infection especially in offices and waiting rooms. Diffusing essential oils in rooms and houses has even been reported to be effective in expelling mold from infested buildings.”

?Which Essential Oils Have Antimicrobial Properties and Are Safe for Children?

Let’s get to the list of oils that are safe to use with children. This isn’t exhaustive by any means, but contains common essential oils that you may have at home already. For each oil, I will list the core respiratory applications and the psyche/emotionapplications. 

This is helpful because when we diffuse oils, they benefit us in two ways:  through inhalation and through olfaction. Inhalation benefits our respiratory system and olfaction benefits our limbic system in the brain (emotions, nervous system, endocrine system, and so on. Each oil has other benefits for other body systems, but since those are not benefits you get through diffusing, I will not cover those.

Common Antimicrobial Oils Safe for Diffusion with Children Over 6 Months

Antimicrobial Essential Oils Safe for Diffusing for Children

Would you like to receive a free PDF of the Antimicrobial Chart and recipes? Just fill out the form below. (If you don’t see the email, check your junk mail folder.)


#mc_embed_signup{background:#fff; clear:left; } /* Add your own Mailchimp form style overrides in your site stylesheet or in this style block. We recommend moving this block and the preceding CSS link to the HEAD of your HTML file. */


Recipes for Diffusion

Now let’s look at some recipes for diffusing the essential oils. For water-based diffusers, you can use anywhere from 5-10 drops of the pure essential oils. Do not dilute the essential oils in a carrier oil before adding them to the diffuser. This will gunk up the diffuser. Of the oils listed, you can use any one singly, or you can mix them together to create a powerful synergy. Here are some suggestions of possible synergies to get you started:

Synergy #1

  • 5 drops Lavender
  • 5 drops Lemon

Synergy#2

  • 3 Drops Geranium
  • 7 drops Lavender

Synergy #3

  • 5 drops Lavender
  • 3 drops Lemon
  • 2 drops Roman Chamomile

Synergy #5 (This blend has more of a medicinal smell due to the tea tree oil.)

  • 4 drops Lemon
  • 3 drops Lavender
  • 2 drops Cypress
  • 1 drop Tea Tree

What are your favorites?

Do you have any favorite synergies that you already use that are kid-safe? I’d love for you to share them in the comment section.

Thanks for reading about diffusing antimicrobial essential oils. I hope you have a healthy year!

Note: If you would prefer not to make your own synergy, I do create custom orders for people. You can also contact me for more information.

Botanically me,

email signature


Discover 5 New Ways to Celebrate a Natural Christmas


The older I get, the more I appreciate the simple things in life.

Celebrating Christmas often puts us into a frenzy as we try to create the perfect holiday for ourselves, our family, and friends. In this post, I’ve curated some natural holiday ideas that I love because of their focus on nature and simplicity and/or the true meaning of Christmas. Try one or try them all, but I pray that you will have the time to experience the love and blessings of God this Christmas season.

A Natural Christmas

  1. 5 Ways to Make Your  Home Smell Good for the Holidays. This amazing post from the Herbal Academy is full of wonderful ideas. Many of them would make a fun activity to do with children. I can’t wait to try #5, the Holiday Spice Potpourri. The spices in this blend are some of my favorites, and besides that, it’s a visual treat for the eyes too.
  2. Old-Fashioned Popcorn Balls from Mother Earth Living. Remember the popcorn balls we used to make and eat as children? Here’s a recipe to enjoy. Even though they purposed this for Halloween, I always associate popcorn balls as a special treat of Christmas.
  3. 55 Last Minute Herbal DIY Gifts.This post by Joybilee Farm has an incredible assortment of herbal gift ideas that you can make. Inspiration is just oozing here. From beverages and food to oils, candles, and beauty products, your biggest challenge will be deciding what to make.
  4. The Twelve Herbs of Christmas. I like this post because it lists 12 different herbs historically associated with Christmas and explains their meaning in the Christmas story. For example, did you know that tradition has it that Joseph cut branches from a thyme bush to make bedding for Mary and baby Jesus? Also along those lines is a post of mine on Essential Oils in the Bible and how to use them today. It includes a recipe for creating a frankincense and myrrh skin blend, which would make a lovely gift for someone or to keep for yourself.
  5. Natural Nativity. Finally, I’ve included my natural, rustic nativities. Each fall, I make these miniature nativity scenes from tree bark from Hickory & Oak Sawmill and Lumber Company (my brother-in-law’s sawmill) and from beeswax. I sell them at Christmas in my Etsy shop if you would like to add one to your home.

What is a favorite way you celebrate a natural Christmas? I’d love to hear about a tradition you have or a new idea you want to try this year.

Merry Christmas!


How to Use Hydrosols

How to Use Hydrosols with Your Family

My first experience with hydrosols came when I received a pack of five of them in the mail as part of my aromatherapy studies. I opened them, smelled them, and … wondered what to do with them. Since that day a few years back, I’ve become a fan of them, well, really obsessed with them, and I use them almost every day. Their gentleness makes them perfect for use with the whole family—even the youngest ones. Let’s explore how to use hydrosols to nurture your family.

What Is a Hydrosol?

  • Hydrosols are a by-product of the essential oil distillation process. You may sometimes hear them called hydrolats, floral waters, herb waters, or distillates.
  • Hydrosols contain the water-soluble constituents of the aromatic plant and retain a very small amount of essential oil.
  • Hydrosols are not the same thing as a few drops of essential oils added to water. That is called an aromatic spritzer.
  • Hydrosols are so mild that they can be used on babies and children much more safely than essential oils can be. (For information on using essential oils with children, read my post on using EOs safely with children.)https://botanicallyme.com/how-to-use-hydrosols/

Benefits of Hydrosols

Hydrosols vs. essential oils

Hydrosols have some of the same benefits as do their essential oils, while being much gentler. They are free of the lipophilic substances that are in essential oils and are richer in water-compatible (hydrophilic) components. This means that they are:

  • highly tolerable
  • soothing
  • generally anti-inflammatory
  • antiseptic
  • wonderful for sensitive skin
  • mildly astringent, yet nondrying

How to Use Hydrosols

https://www.etsy.com/listing/519621878/french-green-clay-powder-french-green?ref=shop_home_active_4Hydrosols can be used as they are without diluting—except for use with children and when ingesting. Here are some ideas to get you started:

  1. Babies. For babies up to six months of age, add 1 tsp of hydrosol to to an infant tub or 2 tsp in an adult tub filled for a baby. For children up to 12 years of age, use 1 tsp of hydrosol per year of age up to 8 tsp. For an adult, use from 1-8 ounces per tub. For foot baths, use 2-3 tbsp for an adult.
  2. For concentrated lotion, cleanser, cream, and gel bases: Add 1 tsp-1 tbsp at a time until you have the consistency you want.
  3. For handmade creams/lotions: Substitute a hydrosol in place of water while you are making the cream.
  4. Aromatic sprays. For adults, use full strength as body sprays or air refreshers.
  5. Toner: Adults can use full strength on face. Can mix multiple hydrosols together or can add aloe vera or honey (1-2 tbsp per 2 oz.) to the mixture.
  6. Masks. Mix a hydrosol (I love to mix German chamomile hydrosol) with green clay for a mask.  Add enough to get the consistency you want.
  7. Compresses. For children add 2 to 3 tsp of hydrosol per 1 liter of water; adults add 3-5 tbsp to 1 liter of water.
  8. Internal Use: For children OVER 3 years of age, add 1-2 tsp to 6-8 oz of a beverage, like water or tea and drink. German Chamomile hydrosol can be beneficial to help a child get to sleep. For an adult, add 1-2 tbsp to a glass of water or tea.

Be creative. Think of the potential of hydrosol uses for sunburns, wet wipes, inflamed skin, diaper rash, and so on.

How to Store Hydrosols

Fresh hydrosol that has been distilled should be pure and free of bacteria. Still, it’s best to store your hydrosols in a sterile container in the refrigerator and use within the year it is distilled.

My Take on Hydrosols

?This summer I experimented with making hydrosols and was successful in making German chamomile

Calendula in the distiller

hydrosol, calendula hydrosol, and lemon balm hydrosol (also called melissa hydrosol). I use the chamomile almost every day as a facial toner and alternate between using it and calendula in clay masks for facials or for bee stings. I have not yet tried it in tea or water, but have plans to mix lemon balm hydrosol in a cup of tea.

?I love the gentle, therapeutic qualities of hydrosols and their light fragrances. The three that I made all retain a lighter aroma of the plant than the essential oil does. If you have children, hydrosols are the perfect soothing herbal treat to use with them, and you don’t have the concerns that you do as when using essential oils.

?Hydrosols are definitely hard to find in retail stores, but you can order them online. Eden Botanicals,  Stillpoint Aromatics, and Mountain Rose Herbs are just three companies that carry them.

?Actually, as an aromatherapist, I can’t recommend hydrosols highly enough. I hope this post has given you some ideas on how to try them, and I bet that soon they’’ll be part of your go-to remedies to care for and pamper yourself and your family!

Let me know if you have any questions in the comment section, or share what your favorite hydrosol is and how you use it.

Botanically me,

Jane

Resources 

I used the resources listed below as I was writing this post. (I am an affiliate for both the New York Institute and Amazon).

The New York Institute of Aromatic Studies is where I received my Level 1 aromatherapy training and certification from. I continue to study with them. You can see all the classes they offer at the hyperlink. They offer both online and in-person classes.

The following two books both have a  section on hydrosols.

<br />

<br />


Herbal Infused Water

It’s September and as I look at my aromatherapy garden, I can see the season changing before my eyes.

My chamomile and cosmos are spent and withered. But the zinnia are going strong and the asters are just getting started. Many of my herbs are still happily blooming, ready and waiting to be plucked and enjoyed. One of my favorite ways to use them is as a healthy water flavoring. 

Healthy Water Flavoring

Early autumn is still a perfect time to enjoy the infused water I’m going to share with you today. It couldn’t be simpler; it tastes wonderful and is so much better for you than soda. This recipe and its variation are also easily adapted. I’ll give you my favorite infused water recipe that I made this year, but, really, you can use whatever herbs you have on hand.

Herbal-Infused Water

Enjoy refreshing water infused with fresh herbs and/or fruit.

  • 2 leaves Rose-lemon Scented Geranium
  • 2 leaves Old-fashioned Rose Scented Geranium
  • 5 leaves Lemon Balm
  • 3 leaves Peppermint
  • 3 leaves Pineapple Sage
  • 1 quart Water
  1. Pick all the fresh herbs and rinse off.

  2. Put herbs in a pitcher and fill with water. Gently prod the herbs with a wooden spoon to release the oils of the herbs.

  3.  Cool in refrigerator or add ice and drink immediately. 

  4. Variation: Add slices of cucumber, orange, lemon, and/or lime. I found that each day the lime was in the pitcher, its flavor became stronger and overpowered the mix. If you use lime, you may want to remove it after the first day.

If stored in the refrigerator, this recipe will keep for about 3 or 4 days. I keep adding water to the pitcher. After four days, discard the herbs and fruit and start over again.


You can see the water in the top left corner

Over the summer, I made a big batch of herb and fruit-infused water that I took with me to a craft fair. The temperature was 96 degrees that day, and I gave the water to everyone who stopped by my booth. It was a hit, and it kept me hydrated during the seven hours I worked.

Enjoy your herbal water, and if you make it, leave me a comment and let me know which herbs and fruit combination you used. You may also want to check out my posts on herbal infused sun tea or my video with personal trainer Sarah Lewis and her Lavender-Vanilla Chai tea recipe.

Botanically Me,


Caffeine Free Chai Tea

Do you love chai tea but the caffeine doesn’t love you?

I can’t do caffeine, so I was excited when my friend and personal trainer Sarah Lewis told me about her recipe for Lavender-Vanilla Chai tea. She then whipped up a cup for me, and oh, my, the taste was heavenly!

I know there are other tea enthusiasts out there who would love the caffeine free version of chai, so Sarah happily agreed to do this video tutorial with me. You can watch below, but keep reading for the recipe.


Customize Chai Tea

One of the fun things about chai is that you can customize the recipe to your taste. The book that I mention in the video is Healing Herbal Teas: Learn to Blend 101 Specially Formulated Teas for Stress Management, Common Ailments, Seasonal Health, and Immune Support by Sarah Farr (note: the link is an affiliate link for Amazon.)  I have this book and in it she has nine different chai recipes!

Sarah uses lavender as her base, and it makes a very fragrant, lovely tea. Lavender is a relaxing herb, so drinking a cup of this lavender chai is a wonderful way help your stress melt away. In addition, the spices that make up chai have so many wonderful  health benefits. They are anti-inflammatory, antioxidant, warming, and carminative.

Note: Sarah likes her tea very spicy, so adjust the amount of spices to your own taste. Also, she likes to bring the milk mixture to a boil, but other chai recipes call for simply warming the milk mixture so that you don’t scald it. I would recommend trying that first because then you can probably avoid the “film or casing”  we mention in the video.

Lavender-Vanilla Chai Tea

Try this fragrant, dessert-like caffeine-free chai tea.

  • 2-3 cinnamon sticks
  • 3/4 inch of fresh ginger root
  • 8 cloves
  • 4 cardamom pods
  • 1 star anise
  • pinch freshly ground nutmeg
  • pinch black pepper grated
  • 1/2 vanilla bean (or 1/4 tsp vanilla extract per cup)
  • 2 cups filtered water
  • 1 cup whole milk (or your choice milk)
  • half-and-half
  • 1 1/2 tsp dried lavender flowers (add up to 2 tbsp)
  1. Pour the filtered water in a stainless steel or ceramic pan and add the first seven ingredients. Put on the lid.  Bring to a boil. Turn down heat and simmer for 30 minutes. Strain this chai mixture concentrate and set aside. Add the vanilla bean (which you have mushed in a mortar and pestle enough to release the vanilla flavor) to the concentrate and infuse for 2-5 minutes. Strain this out.

  2. Add the milk and lavender flowers to another saucepan, put the lid on, and warm without boiling. Turn off heat and strain the flowers out. 

  3. Fill your cup about 2/3 to 3/4 full with the chai mixture. Add the lavender milk mixture. If using vanilla extract, add that now. 

  4. Top with Half and Half if desired. Sweeten with honey or other sweeter if desired to taste. Enjoy!

  5. The concentrate can be stored in the refrigerator for up to one week.

You can reach Sarah Lewis via her Facebook page if you would like to schedule a personal training session in the Indianapolis area. She is also available for Skype personal training sessions if you are long distance.

Let us know if you try the recipe and any of your favorite chai “modifications.”

Botanically me,