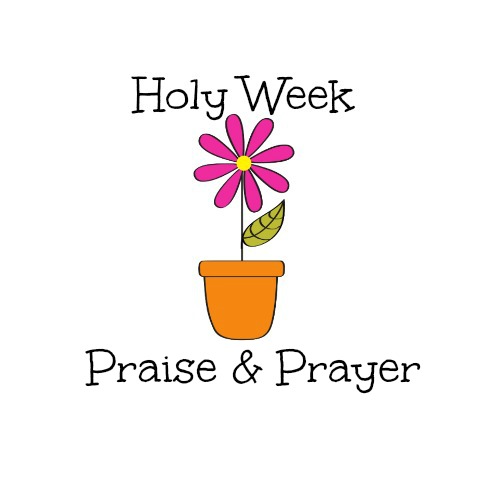
Holy Week is a time for us to praise, pray, and prepare ourselves for Easter Sunday. Mary and I would like to invite you to join Only By Prayer as we spend some time together this week doing just that.
Each day this week starting on Palm Sunday, we will post a scripture from the Psalms for you to meditate on. We will use this same post for the entire week, so we will simply add the new scripture to this post each day. Be sure to check back each day. We are taking the suggested reading from the LectionaryPage.net .
Here is a possible way you could interact with each day’s scripture, but feel free to let the Holy Spirit lead you.
Read the day’s selected verses.
Praise God using any themes that stand out to you as you are reading.
Pray that the Holy Spirit will help you to incorporate those themes into your own life, into the life of your family and friends, and into our nation.
Write down any takeaways you want to remember from that day’s reading and prayers.
Share any of your praises, prayers, and thoughts in the comment section of the post. Feel free to respond to others’ comments as well.
Thank you for joining us. You’re more than welcome to invite others to journey along with you this week too! We’ll be praying for us all that God will prepare our hearts for Jesus’ Resurrection Sunday.
Getting your children to go to sleep can seem like the impossible dream when you’re stuck in the bedtime battle doldrums. If you’ve given up at ever getting a decent night of sleep again, let me ask you to try one more thing: child-safe aromatherapy solutions.
In this post, we’ll answer the question can aromatherapy help your child sleep, and I’ll also share a few non-aromatherapy tips I used with my own now-grown kids that will help make bedtime a battle-free zone.
Start a Bedtime Routine
Before you break out the lavender oil, it helps to have a bedtime routine in place. My hubby and I started this with our kids when they were just newborns, and we stuck to it the best we could each night. Of course, the first two months with a baby are pretty chaotic, but decide what you want your routine to look like and start working toward it.
Establish a bed time. Our goal was to have the baby in bed by 8 p.m. Now when we first got home from the hospital with Amber, by the time we all settled down, it was about 10:30 p.m. However, each week it got a little better. When she was around two months old, we were putting her to bed at 8:30 p.m.
Start planning backward from your chosen time. If you want to put the kids to bed at 8 p.m., then start getting ready at 7 p.m. Toddlers and older kids can help by picking up their toys, getting out their pajamas, getting backpacks ready for school, and so on.
Next comes bath if needed.
Read a few bed time stories. Today Amber has a 20-month old, and from the day she and Andrew brought him home from the hospital, reading books became part of their nighttime routine.
Rocking. After story time, rock the little ones for a few minutes and sing a lullaby.
Prayers. Put them in bed and say prayers.
Hugs and kisses and head out the door, without belaboring this time.
We did this routine every night, so our kids knew what to expect. Overall, it worked well, and for the most part we avoided big battles with the occasional exception. If you’re having lots of problems with behavior, check out this book (affiliate link) by Kevin Leman called Making Children Mind Without Losing Yours. I used it with my kids and found it so helpful. It’s filled with common sense ideas and practical suggestions to use with children from babies to teens.
Aromatherapy for Sleep
Since I became a certified aromatherapist two years ago, I’ve learned how essential oils and other botanical products can help ease a child — and adults — into sleep. Let’s look at a few ideas. Try these one at a time so you can judge what works best for your child.
Take an Aromatherapy Bath
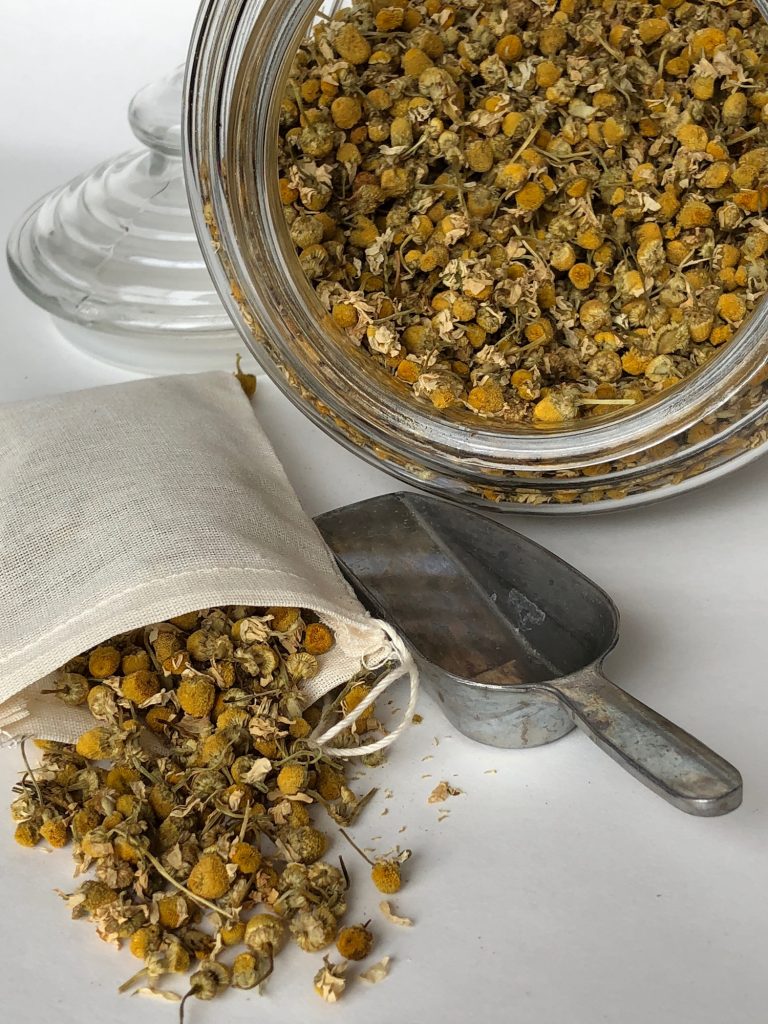
I love hydrosols! If you’re not familiar with them, hydrosols are a byproduct of the distillation process of essential oils. Sometimes they are called “flower waters” or “hydrolats.” They contain a tiny amount of the essential oil along with the water soluble, volatile components of the plant. They are still effective and much gentler than essential oils. Two perfect ones to try with little children are lavender and German chamomile. Remember, never add essential oils straight to the water. They are too strong for children’s (and adult’s) skin. Hydrosols, however, can be added directly to the water.
Try this suggestion: add 1 tsp of your chosen hydrosol to an infant bathtub or 2 tsp. of hydrosol added to an adult tub filled with a smaller amount of water suitable for an infant. For children up to 12 years old, add 1 tsp. of hydrosol to the bath water for every year of age up to a maximum of 8 teaspoons.
Add bath herbs.
Another suggestion is to take a good-sized handful of either dried lavender flowers, dried chamomile flowers, or a combination of both, put them in a muslin bag and drop it in the bathtub while the child is bathing,.
Sip warm milk with warming spices and hydrosol.
Warm up a cup of milk for your child and to that add from 1 tsp to 1 tbsp of hydrosol for children over the age of three. German chamomile is a wonderful hydrosol to use in this recipe. Next add cinnamon and nutmeg into the mixture and stir. Have the child drink about an hour before bed.
Try an Aromatherapy Massage
Most essential oils are too strong for babies up to six months of age to use every day. A good alternative is to use a body butter infused with chamomile and lavender flowers. It will still contain some of the volatile components of the plant but will be gentle enough for use on a baby. For children over two years of age, you can use an aromatherapy foot cream that contains from about 0.5% to 1% dilution rates of essential oils to cream or carrier oil. For example, add 4 drops lavender and 1 drop German or Roman chamomile to one ounce of cream.
Make an Aromatherapy Mister
Aromatherapy misters are another option, and they are very easy to make. For school-age children, fill a one-ounce spray bottle with water or lavender hydrosol. To that add 5 drops Roman chamomile, 10 drops lavender, and five drops of mandarin essential oil. Mist in the room as they are dropping off to sleep. For babies over six months, toddlers, and pre-schoolers, fill bottle with lavender hydrosol and add about three drops of essential oil to the bottle then lightly mist in the room.
Try an Aromatherapy Oil Diffuser
A final suggestion is to diffuse essential oil in the child’s room about 20 minutes before bedtime and then shut it off as you leave the room. You may be asking the question, Are aromatherapy diffusers safe for babies? Great question. The answer is yes, when you follow these guidelines:
This is safe starting at the age of six months for short periods of time (for a specific reason, like sleeping).
Start with a small number of drops like 2, and adjust accordingly and as the child grows, capping the number at about 10.
Try an Aromatherapy Sleep Pillow
Aromatherapy sleep pillows are easy to make and can be tucked into an older child’s bed pillow or positioned close to the crib of a baby. Typically they are made with sleep-inducing herbs like lavender, chamomile, hops, catnip, and others. My friend and artist Cindy Schultz and I are collaborating on a project of sleep pillows, which she’ll soon be selling. Watch her Instagram feed for more information.
Let’s break the stressful bedtime battles with a sane schedule and some aromatherapy sleep aids to help lull your child to sleep. Let me know if you have any questions. I’ll also leave you with this: What is your favorite tip on getting your children to sleep (aromatherapy or otherwise)? Please share in the comment section below.
By the way, I am available for consultations if you’d like help formulating an aromatherapy or herbal product for your child or yourself.
As always, all material provided on this website is provided for informational or educational purposes only. It is not intended as a substitute for the advice provided by your healthcare professional or physician. Please consult your healthcare professional regarding any physical, mental, or emotional conditions.
Starting Seeds Indoors with Rita Ward
Recently, the Polar Vortex had most of the U.S. in its icy grip, including the Midwest where I live. This winter we’ve been socked in with cold temps and snowy days. So it’s with great joy that I can make this announcement:
It’s time to think about starting seeds indoors for your spring garden!
A Quick Background
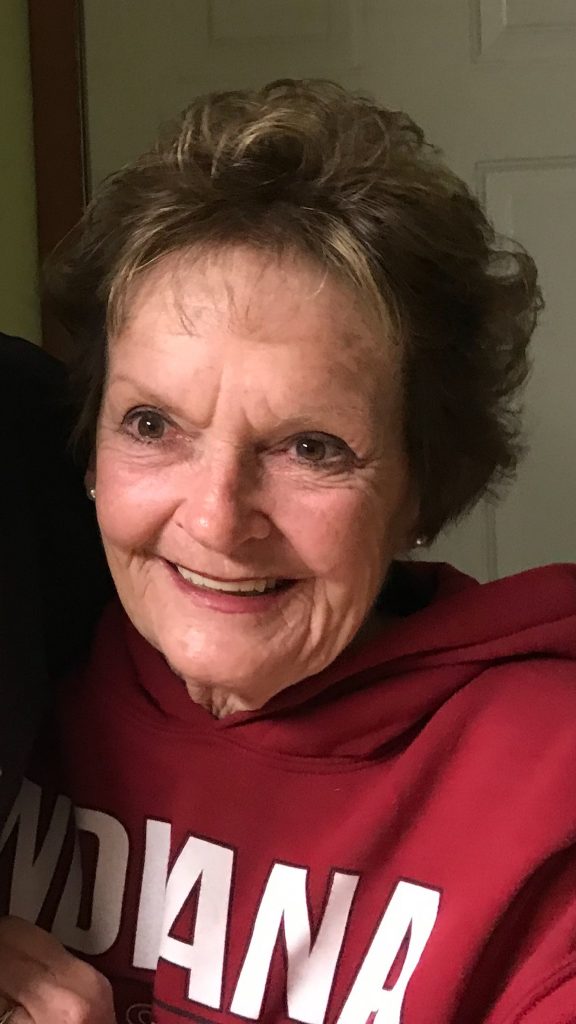
Rita Ward
If it seems early to you, consider that lifelong gardener and seed starter extraordinaire Rita Ward has already been hard at work starting her seeds. Rita was my seatmate on a recent airplane trip, and as we talked and got acquainted, we discovered a mutual passion for gardening.“I’ve been gardening and going to farmers markets for 56 years,” she said. So I knew right away I could learn something from her. She was more than happy to give me some gardening tips to share, so let’s get started.
To give you a bit of perspective, Rita is retired and owns a small house located on her daughter’s 15-acre property in Cloverdale, Indiana. Each year she plants a full 1/2-acre plot and sells her produce all season long at the Greencastle farmers market and at a road stand in front of their property.
Rita’s Top 15 List
Tomatoes
Squash
Peppers
Melons
Corn
Green Beans
Sweet potatoes
Asparagus
Persimmons
Red raspberries
blackberries
strawberries
Apples
Peaches
Plums
Tomatoes Galore!
Every year Rita sets out an astonishing 300 tomato plants, all of which she propagates by starting seeds indoors. Now I’m sure that most of us will never need that many tomato plants, but however many you want to grow, it is much cheaper if you can grow the plants from seed yourself. Noting that “you can’t save seeds from hybrids,” Rita loves to grow all sorts of heirloom varieties.
Each year as she is harvesting her plants, she collects seed from her heirloom plants. She puts the seeds on paper towels to dry. Once they are dry, she puts the paper towel in a plastic bag, labels it, and stores it in the freezer until planting time rolls around the next year.
Starting Seeds in a Greenhouse
Now, I’ve never been very successful at growing plants from seed, so I was interested to hear Rita’s method. Actually, way of life is the more accurate description. You see, Rita was born following the Depression.
“My generation and my family were taught not to waste and to take care of everything.”
Rita Ward
That truth is clearly evident in how she gardens.
Method 1
Being that her home is very small, Rita has to make use of outdoor space when starting seeds. Every year in late winter, she completely encloses her patio by wrapping sturdy plastic around the posts to make an outdoor room. Inside of the now enclosed patio she puts a small, inexpensive greenhouse (see a sample picture at the bottom of this post).
Since late February is still freezing in Indiana, she had to devise a way to heat her patio. Rita found an online tutorial that showed her how to make a mini fireplace using landscaping stones, a bread pan, candles, and an upside down flower pot.
Large pillar-type candles purchased at Goodwill and garage sales
Paraffin wax
Pour Pot to melt the wax in (can find at Hobby Lobby)
Large metal pot to use as a double boiler
Directions:
Fill the large pot with a few inches of water and turn on the heat. Add one or two pillar candles to the pour pot and some paraffin wax and set in the double boiler. Melt. The wicks from the candles should sink to the bottom of the pour pot as they melt. Pour the melted wax into a bread pan and fill about 3/4 full of the wax. Discard any of the wicks from the melted candles. (NEVER set a pan with wax directly on a burner to melt. Wax is flammable. Always use a double boiler.)
Take one emergency candle and cut it into 3 pieces, being sure each piece has about one-quarter inch of wick protruding from the top. As the wax in the bread pan is starting to set up, take two or three pieces of the cut emergency candles and set them in the wax with the wick sticking out. These will be the wicks that you will light for the bread pan candle.
Let the pan cool.
Place one landscaping stone flat on the floor inside the enclosed patio area (not inside the small greenhouse). Set the bread pan on top of the stone. Stand up two bricks on either side. Put the upside down flowerpot on top as shown in the picture.
Light the wicks.
Rita says one bread pan candle will burn all night.
Of course, use extreme caution, especially around children. The flowerpot will get extremely hot.
I found a similar flowerpot fireplace online tutorial, which I am sharing here. The big difference here is that Rita’s candles burn for one full night, while these only burn for 3 hours at a time.
Method 2
Because this winter has been so cold, Rita has focused on starting seeds indoors in her small furnace room. She had just enough space for her greenhouse. The room is warm, so she doesn’t need to worry about any extra heat, so no fireplace needed! Keep reading for instructions on seed starting.
Rita’s Tips for Successful Seed Starting.
Try running a small fan to circulate air, helping to prevent fungus from forming on the plants.
If the greenhouse is indoors, leave the door of the greenhouse open.
Be sure to keep the soil moist.
Use a mix of organic seed starter and organic potting soil. She thinks the seed starter is too light to use by itself.
Starting Seeds in a Paper Towel
Once her patio area/greenhouse is ready, Rita takes the seeds she has dried out of the freezer and works through the following steps:
Purchase round plastic plant trays from the Dollar Store (the type you put under houseplants to catch water drainage).
Line the bottom of the tray with a combination of organic seed starter mix and regular potting soil mixed together.
Set the paper towel with the seeds that you dried directly on the soil and cover the paper towel and seeds with another layer of soil. Alternatively, purchase seeds and plant the seeds directly in the soil following the directions on the package. Carefully water. Cover the tray with a layer of plastic wrap. Make sure you keep the soil moist.
While many sources advise to keep the seeds in the dark, Rita hangs LED electric candles (like the type you put in your window– see the picture) upside down on the rack so one candle is hanging above each shelf. She leaves them on around the clock. “The bulbs don’t get hot she says.”
When you see sprouts, remove the plastic wrap or lid. Hang grow lights (pictured at the bottom of the post) and keep them 2 to 3 inches above the plants. Rita actually keeps her lights burning day and night.
Once the seedlings have two leaves, transplant them. Styrofoam cups with a hole work well or larger Jiffy pots (also pictured below). Continue to keep them under the grow lights until you move them outside.
Rita deep waters the plants about once every 10 days. Between deep waterings, she mists them with a spray bottle when the soil starts looking dry.
Rita’s Greenhouse with SeedlingsGrowing Seedlings
Transplanting Outside
At the end of March, Rita moves the seedlings outdoors to their permanent location in the garden bed. Now this is about six weeks earlier than the last frost date, so she has to protect them. She covers about half of her half-acre plot with black plastic to cut down on the weeding and to help the soil warm up so that she can plant as early as possible. By this time she has over 500 seed tomato plants ready to be planted!
She then follows these steps for outdoor planting:
Cut a hole in the black plastic and insert the tomato plant in hole.
Take a sheet of newspaper, fold into a narrow strip and wrap around the base of the tomato plant. This helps to keep weeds at bay and helps keep the soil moist.
Cover the roots and up to the first leaves with soil.
Stake and cage each plant.
Protect each plant with a plastic milk jug in cold temperatures. Be sure to remove jug in warmer temperatures to prevent wilting.
She uses bamboo hoops and row cover fabric to further protect the plants in the evening and on any days that might be below freezing.
Since Rita gets such an early start with her plants, she is always one of the first ones at the farmers market to have tomatos to sell. In a good year, she’ll have tomatoes at the market by June 1.
Summer Harvest
Garden Harvest
With the amount of fruits and vegetables Rita plants, she has a bountiful harvest with plenty to sell and much to preserve. “Canning along with freezing, dehydrating, and wine-making keeps me from losing much from my gardening,” she said.
Rita is thankful for the skills she has been given and wants to pass them on. “This is beginning to be a lost art, don’t you think?” she said. “I feel like the Lord gave me this, so I need to take care of it!”
Rita’s Tip for Greening Up Tomatoes, Peppers, and Roses
1/2 cup Epsom Salt
1 1/2 gallons water
Mix the salt in the water and use to water tomatoes, peppers, and roses once every two to three weeks. Often, she also adds fish emulsion to the mix.
Are You Ready to Try Starting Seeds Indoors?
Now maybe you don’t have a half-acre that you want to plant like Rita, but you’ve been inspired by her story to try starting seeds at home. Starting at least some of your crop from seed gives you a wider variety of plants to choose from, including more heirloom varieties. Here are a few suggestions:
Start small if you’ve never done this before.
Make your own seed starting kits by purchasing round plastic trays like Rita or try starting seeds in egg cartons.
Or, if you want an easier option, buy a Jiffy seed starting kit (pictured below) that you can find in any garden center, big box store, or on Amazon.
Purchase a set of grow lights at a big box store or online.
Remember to water and follow directions carefully.
Favorite Seed Companies
You can find seeds just about anywhere, but if you want to order online, here are some of my favorite companies.
Botanical Interests They have a great variety of seeds, and I love their option of purchasing large packets of seeds and seed collections. They also have the MOST beautiful seed package artwork.
Urban FarmerThis store is just one mile from my house and they have a great selection of non-GMO seeds. They focus on heirloom varieties that don’t need to be cross-pollinated. They also sell garden supplies.
Renee’s Garden.They also have a wonderful variety of seeds and beautiful artwork on the packaging as well.
Seed Libraries. The public library near me (Carmel Clay Public Library) actually has a seed file cabinet, where you can “check out” heirloom seeds to plant in your garden. Check and see if your community has something similar.
Are you ready for the 2019 gardening season? I know I am. What are you planting, and will you be starting seeds indoors? Leave me a comment. I’d love to hear your plans!
Botanically me,
Just to let you know, I am an affiliate for Amazon and Botanical Interests. If you happen to purchase anything from Amazon or Botanical Interests through my links, I will make a small profit from it, so thank you very much. It helps me to continue writing and working. I only recommend products I use/believe in.
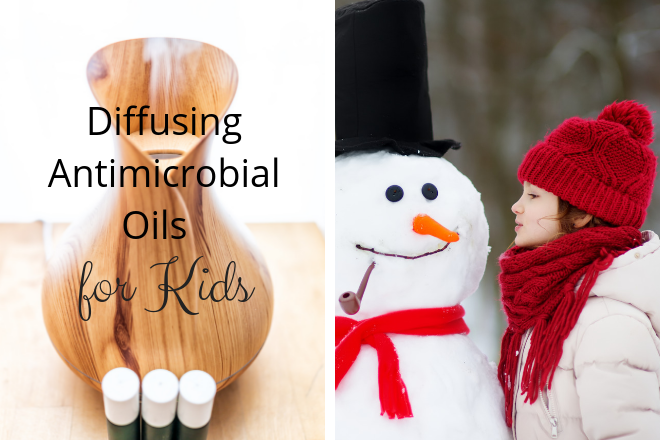
Everything You Wanted to Know About Diffusing Antimicrobial Essential Oils for Kids
It’s that time of year when you hurry through the grocery store trying not to breath too deeply. All around you people are coughing and sneezing, spreading this year’s strain of the flu bug and who knows what else!
The last thing you want to do is get sick and spread it to your kids and husband. I can’t think of a better time than now to be proactive in diffusing antimicrobial essential oils at your house.
Safety First
Before we consider which essential oils to use, we need to remember how to safely diffuse essential oils around babies and young children (see this post for more information on children and safety with essential oils in general) :
Don’t diffuse essential oils with children under the age of six months.
Once children reach the age of six months, you can diffuse child-safe essential oils for short periods of time for acute conditions, such as a cold or flu.
Keep in mind that eucalyptus and certain chemotypes of Rosemary should be avoided on children under age 10. Don’t use peppermint with children under age 6. This is due to the possibility of slowed respiration caused by menthol and 1,8-cineole in the essential oils. (These guidelines apply to both topical use and inhalations.)
When diffusing essential oils, run the diffuser for about 30-45 minutes minutes. Then shut off for about 60 minutes. Do not run it continuously.
Please check for interactions between any medications/herbs/supplements you may be taking and any oil you want to diffuse. Additionally, if you have a chronic illness, research any oils that may be contraindicated for your condition. Healthnotes is a site that may be helpful for this, as is ND HealthFacts.
Now that we know how to properly use essential oils, let’s look at the antimicrobial essential oils that are safe to diffuse with children over the age of six months. We’ll start with a quick definition of antimicrobial.
What Are Antimicrobial Essential Oils?
Antimicrobial essential oils are oils that have antiseptic (disinfectant) properties, meaning they reduce microbial growth. Using antimicrobial essential oils and a diffuser to help clean the air in your home is a potent weapon to have in your arsenal of natural health tools.
But keep in mind that it doesn’t mean that each essential oil kills ALL the various bacteria, virus, and fungi out there; instead, each one is effective against certain ones.
According to Kurt Schnaubelt, Ph.D., in The Healing Intelligence of Essential Oils p. 136,
“Diffusing them [essential oils] into rooms will lower the count of airborne microorganisms significantly, reducing the risk of infection especially in offices and waiting rooms. Diffusing essential oils in rooms and houses has even been reported to be effective in expelling mold from infested buildings.”
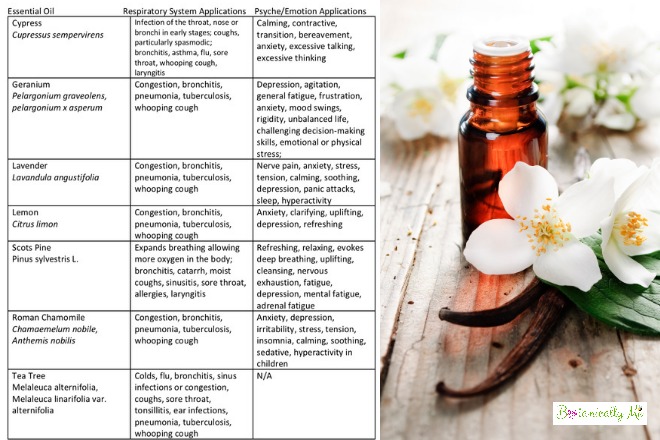
?Which Essential Oils Have Antimicrobial Properties and Are Safe for Children?
Let’s get to the list of oils that are safe to use with children. This isn’t exhaustive by any means, but contains common essential oils that you may have at home already. For each oil, I will list the core respiratory applications and the psyche/emotionapplications.
This is helpful because when we diffuse oils, they benefit us in two ways: through inhalation and through olfaction. Inhalation benefits our respiratory system and olfaction benefits our limbic system in the brain (emotions, nervous system, endocrine system, and so on. Each oil has other benefits for other body systems, but since those are not benefits you get through diffusing, I will not cover those.
Common Antimicrobial Oils Safe for Diffusion with Children Over 6 Months
Antimicrobial Essential Oils Safe for Diffusing for Children
Would you like to receive a free PDF of the Antimicrobial Chart and recipes? Just fill out the form below. (If you don’t see the email, check your junk mail folder.)
Recipes for Diffusion
Now let’s look at some recipes for diffusing the essential oils. For water-based diffusers, you can use anywhere from 5-10 drops of the pure essential oils. Do not dilute the essential oils in a carrier oil before adding them to the diffuser. This will gunk up the diffuser. Of the oils listed, you can use any one singly, or you can mix them together to create a powerful synergy. Here are some suggestions of possible synergies to get you started:
Synergy #1
5 drops Lavender
5 drops Lemon
Synergy#2
3 Drops Geranium
7 drops Lavender
Synergy #3
5 drops Lavender
3 drops Lemon
2 drops Roman Chamomile
Synergy #5 (This blend has more of a medicinal smell due to the tea tree oil.)
4 drops Lemon
3 drops Lavender
2 drops Cypress
1 drop Tea Tree
What are your favorites?
Do you have any favorite synergies that you already use that are kid-safe? I’d love for you to share them in the comment section.
Thanks for reading about diffusing antimicrobial essential oils. I hope you have a healthy year!
Note: If you would prefer not to make your own synergy, I do create custom orders for people. You can also contact me for more information.
Botanically me,
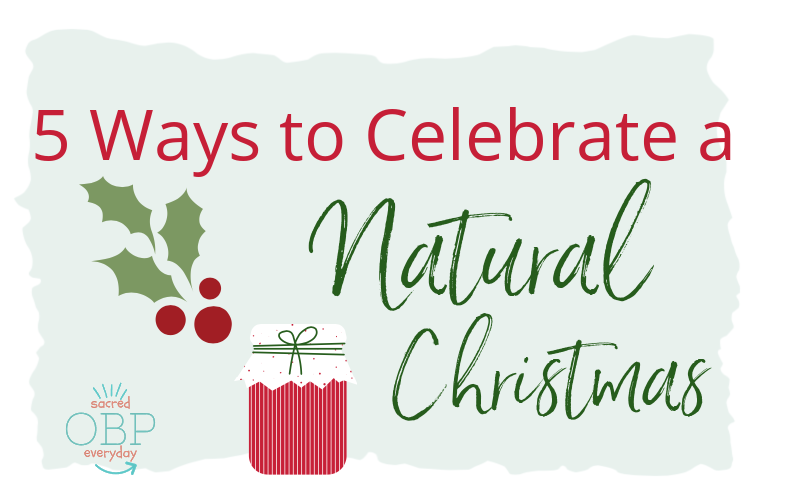
Discover 5 New Ways to Celebrate a Natural Christmas
The older I get, the more I appreciate the simple things in life.
Celebrating Christmas often puts us into a frenzy as we try to create the perfect holiday for ourselves, our family, and friends. In this post, I’ve curated some natural holiday ideas that I love because of their focus on nature and simplicity and/or the true meaning of Christmas. Try one or try them all, but I pray that you will have the time to experience the love and blessings of God this Christmas season.
A Natural Christmas
5 Ways to Make Your Home Smell Good for the Holidays. This amazing post from the Herbal Academy is full of wonderful ideas. Many of them would make a fun activity to do with children. I can’t wait to try #5, the Holiday Spice Potpourri. The spices in this blend are some of my favorites, and besides that, it’s a visual treat for the eyes too.
Old-Fashioned Popcorn Balls from Mother Earth Living. Remember the popcorn balls we used to make and eat as children? Here’s a recipe to enjoy. Even though they purposed this for Halloween, I always associate popcorn balls as a special treat of Christmas.
55 Last Minute Herbal DIY Gifts.This post by Joybilee Farm has an incredible assortment of herbal gift ideas that you can make. Inspiration is just oozing here. From beverages and food to oils, candles, and beauty products, your biggest challenge will be deciding what to make.
The Twelve Herbs of Christmas. I like this post because it lists 12 different herbs historically associated with Christmas and explains their meaning in the Christmas story. For example, did you know that tradition has it that Joseph cut branches from a thyme bush to make bedding for Mary and baby Jesus? Also along those lines is a post of mine on Essential Oils in the Bible and how to use them today. It includes a recipe for creating a frankincense and myrrh skin blend, which would make a lovely gift for someone or to keep for yourself.
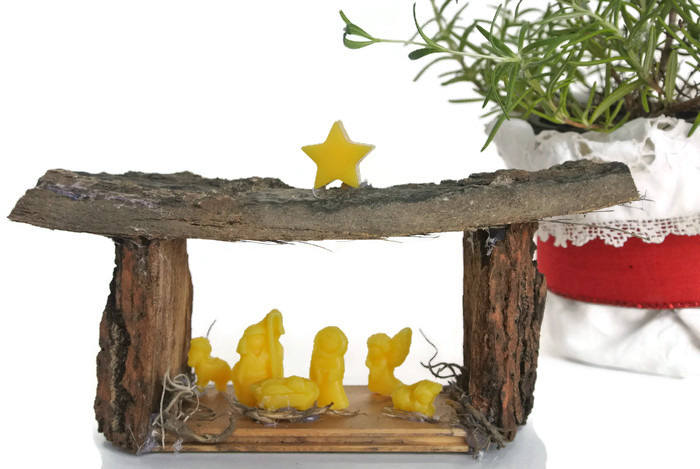
Natural Nativity. Finally, I’ve included my natural, rustic nativities. Each fall, I make these miniature nativity scenes from tree bark from Hickory & Oak Sawmill and Lumber Company (my brother-in-law’s sawmill) and from beeswax. I sell them at Christmas in my Etsy shop if you would like to add one to your home.
What is a favorite way you celebrate a natural Christmas? I’d love to hear about a tradition you have or a new idea you want to try this year.
Merry Christmas!
Small Business Saturday Events
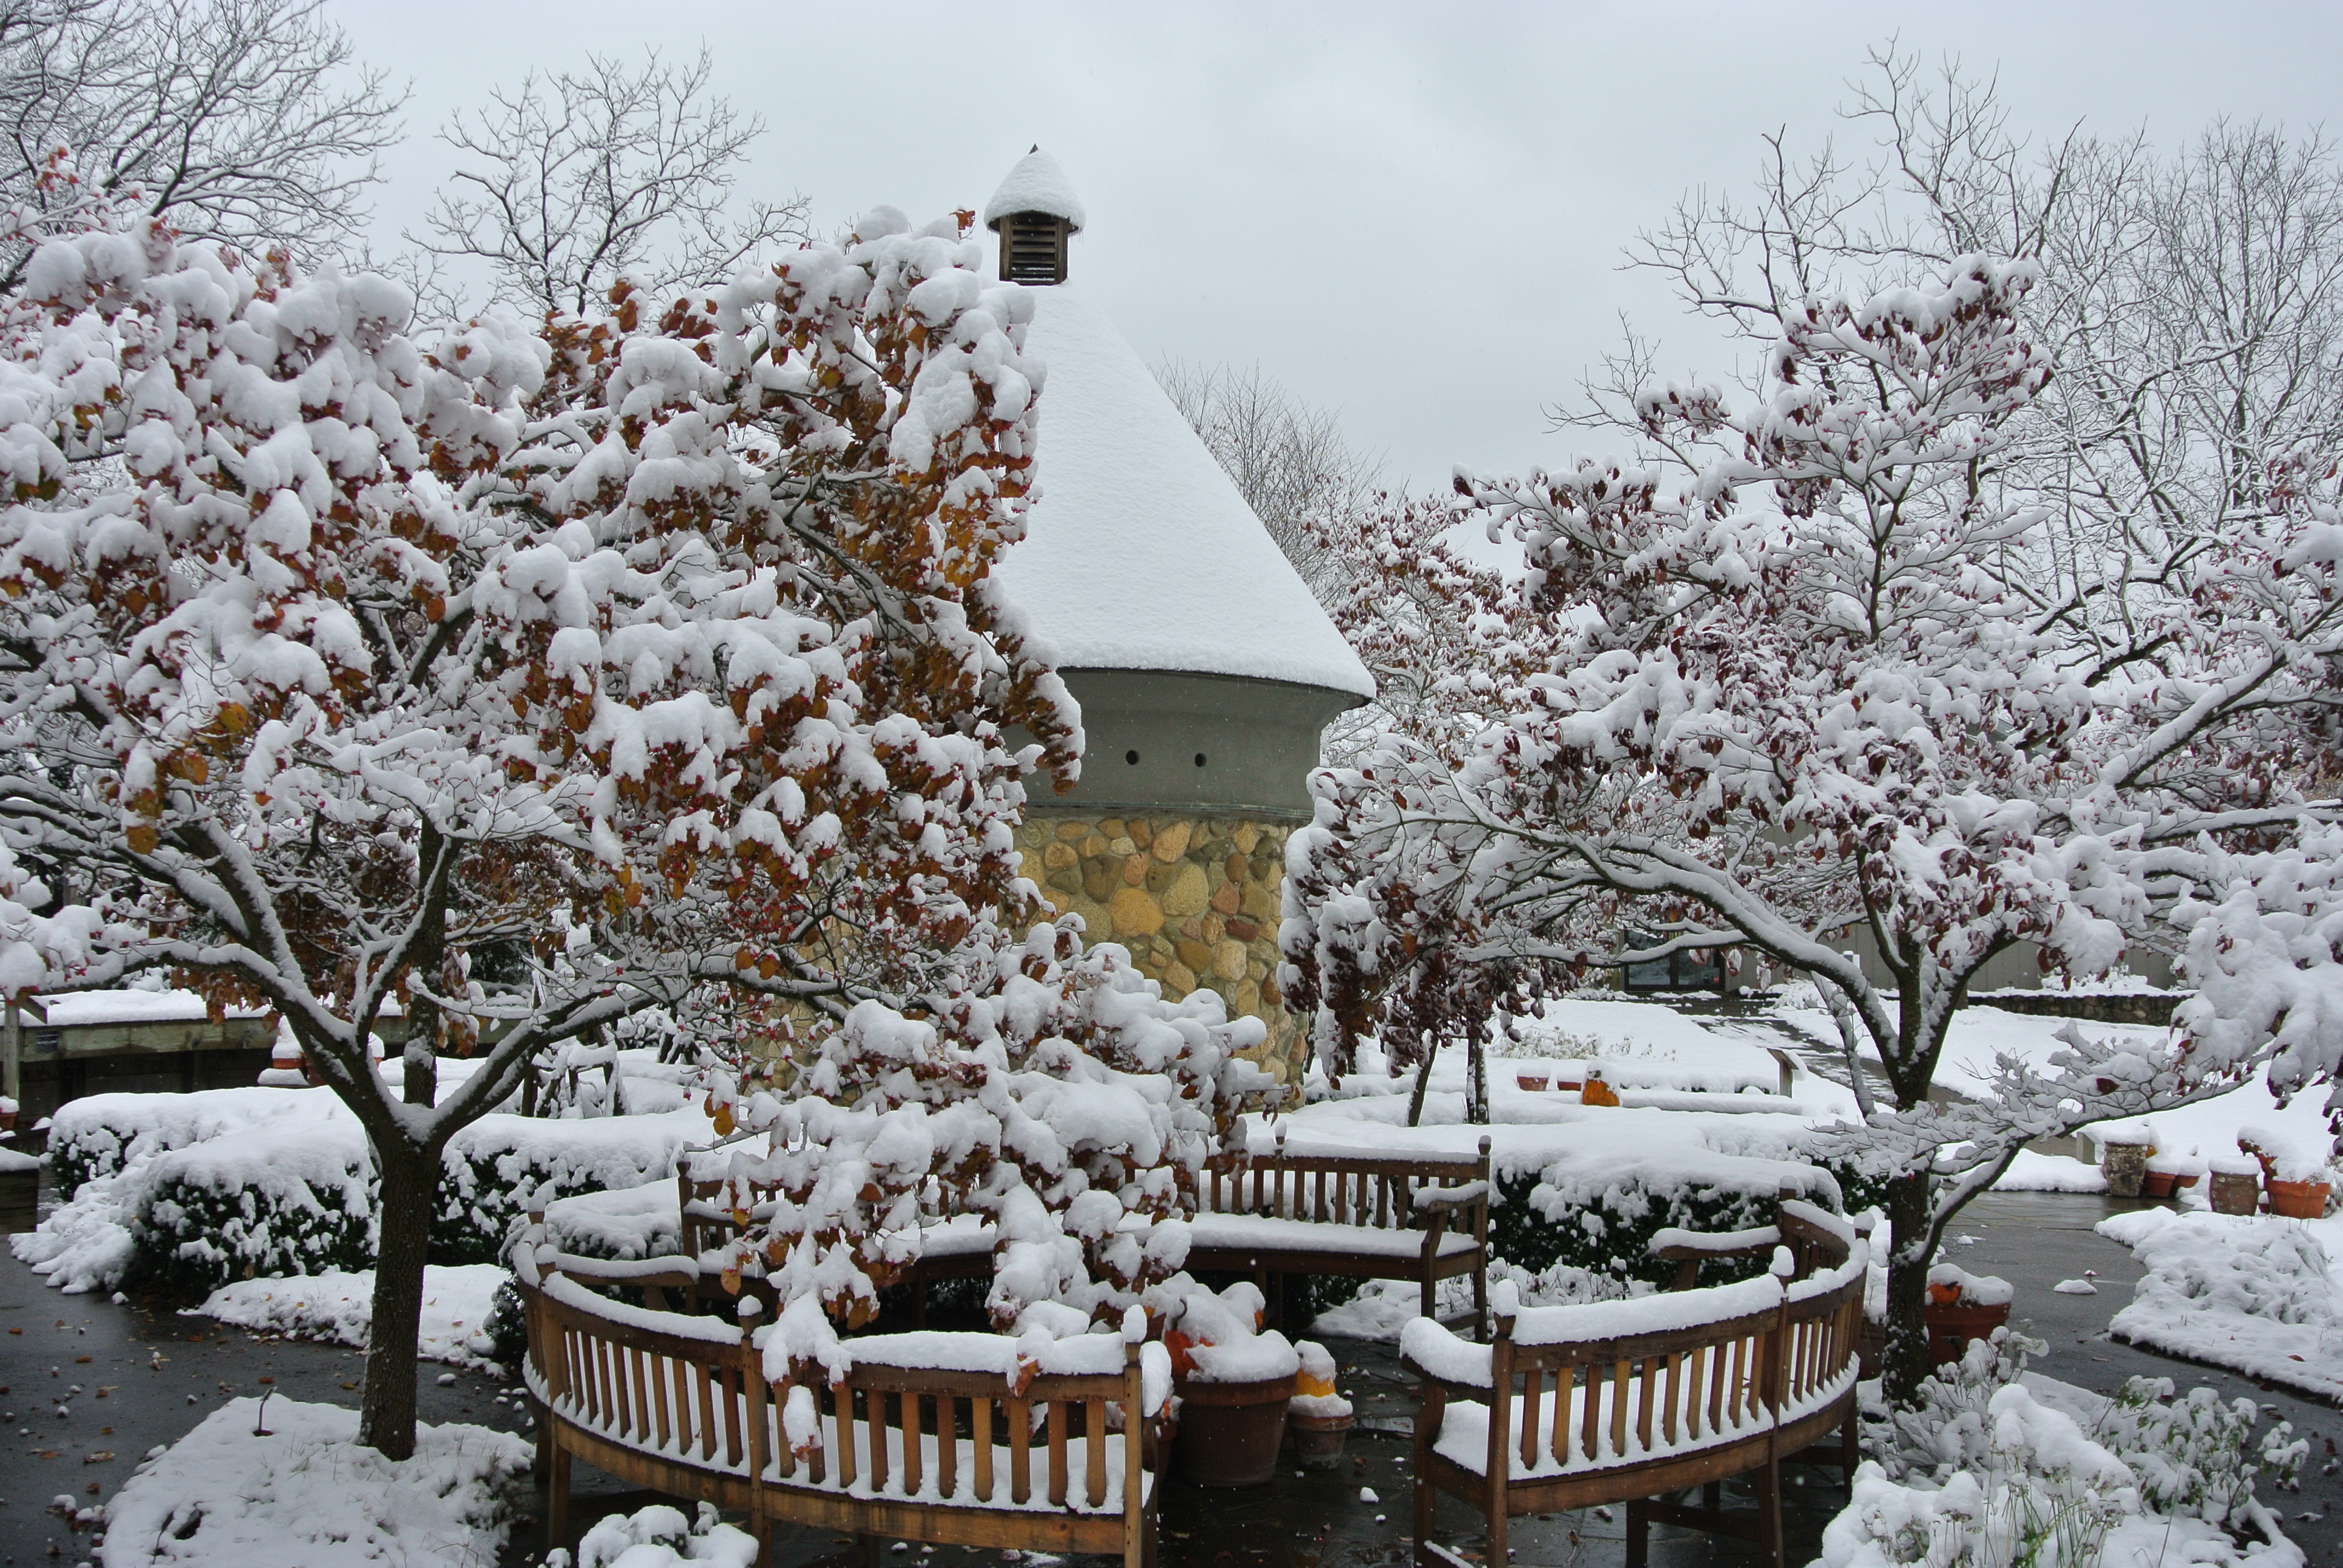
I took the photo you see at Fernwood Botanical Gardens and Nature Preserve in Niles, Michigan. Niles is my hometown and Fernwood is a favorite place. The first weekend of November, I was fortunate enough to be invited to participate in their Holiday Market. It was a wonderful way to kick off the holiday season.
As we head into Thanksgiving week, I’m going to take some time to reflect on all the things I am thankful for: my faith, my family, my little grandson, friends, my home, a job I love, just to name a few things. It’s important in the midst of busy lives and hectic days to stop and reflect on what’s important.
Preparations for Small Business Saturday
Fernwood Holiday Market
And it has been a busy week. I’ve been getting ready for Thanksgiving and also preparing for Small Business Saturday (November 24). I’d like to highlight a few of the things I’m doing this Christmas with my business.
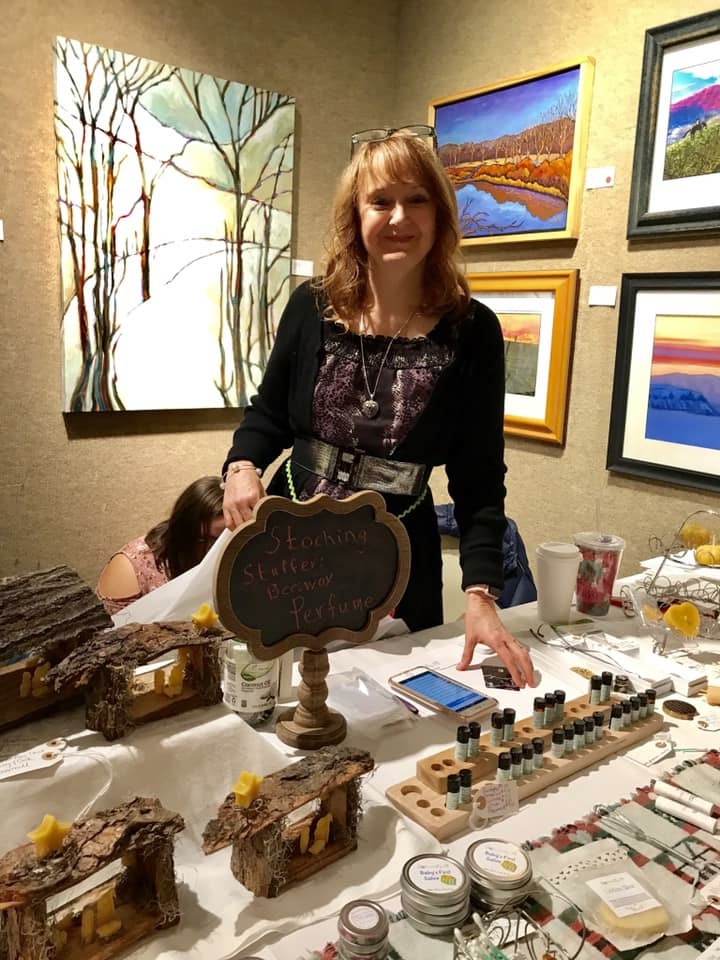
Nickel Plate Arts, Gifted. I am one of the makers participating in Gifted at Nickel Plate Arts in Noblesville, IN. The gallery is being transformed into a unique Holiday Boutique where shoppers can purchase handcrafted gifts from local artisans. It starts on Black Friday , November 23, and runs through December 29. Check the above link for the dates and times the boutique is open. It is located at the Judge Stone House at Nickel Plate Arts, 107 S. 8th Street Noblesville, IN 46060.
Small Business Saturday. On November 24, Small Business Saturday, I will be at Gifted from 11 a.m. to 1 p.m. doing a demonstration of rolling my beeswax taper candles. Come and try your hand at rolling one if you’d like and you can also pick out a few Christmas gifts for your family and friends from the selection at the gallery.
Etsy Shop Sale. From November 21 to November 26 everything except for the nativities will be discounted 20 percent in my Etsy shop.
Nativity Sale. From November 23 to November 27, my Christmas nativities will be discounted 15 percent. I have a limited number of these available as they are time consuming to make, so if you’d like one, be sure to take advantage of the sale!
Holiday Workshops. Saturday, December 1, and Saturday, December 8, I will be offering Aromas of Christmas workshop. You’ll learn about the essential oils associated with Christmas, create a make-n-take product, and enjoy herbal tea and a snack– all for only $25. It’s a fun girls outing or mother-daughter event. Other dates are available as well. Contact me for details if you need a different date than what is listed.
Thanks so much for your support, and I hope you have a blessed Christmas as we celebrate the birth of Jesus!


